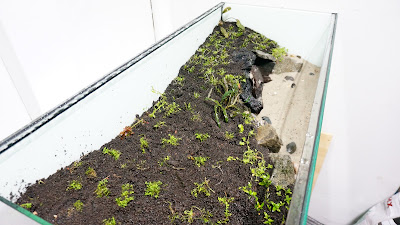
Have you ever heard about DSM before? That is not "Dover Street Market" as what you can see from the first Google Search. If you search the keywords "DSM Aquarium", you will get the right result for "Dry Start Method" for planted tanks.
This method starts with the emersed growth of plants in a high humidity environment. Once the plant root systems are developed and plants are healthy, water can be introduced into the tank and the submersed form can be established. It is quite similar to the nature of the riverbank where water raises up and down and aquatic plants need to adapt to such environment. Emersed planting setup was mentioned in my
other post on a small scale.
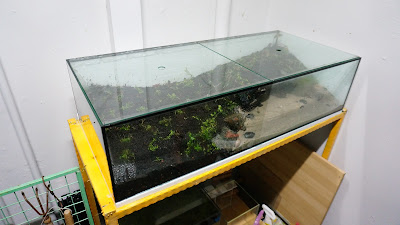
I finally decided to go for a super low-tech tank at my
outdoor corridor using DSM.
Since I already got a metal aquarium stand which is very
sturdy, I just needed to hunt for the tank itself. It was no rushing at all. I
normally enjoy the period of gathering the equipment one-by-one. J Furthermore, I really enjoy the process of making something old/rusty/ antique into something more aesthetic. It is like bringing a brand-new life into it.
And the chance came on Facebook Market. I found the aquarium
size of 90cmLx40cmWx22cmH which was perfect for my plan. I want to have a low-tech tank which I can enjoy it as an aquarium as well as a pond. With this shallow tank, I can have a good view from the top and the fishes got benefits from the wide and long surface to wonder around. So, I quickly arranged
with the seller to secure the deal which is inclusive of delivery fee with a very reasonable price.
I bought a white foam matt from an LFS in Serangoon North to insert as a
cushion below the tank and, tada, everything was ready for setup.
 |
| Out-door low-tech tank |
To create the "cave" for the fish family, a piece of driftwood which has an existing hole was used and laid horizontally on the bottom of the tank. Since I would like to create a bay of sand at the front of the tank, some granite rocks were used to create the barrier of soil and sand. Granite rocks do not have very outstanding characters as seiryu rocks/ elephant skin / manten stones...etc. but they work very well to separate planting area and sandy area in your aquascape. My plan is to cover those rocks with moss anyway, so the looks of the rocks was not so critical. :)
 |
| The bay was formed up with rocks and woods |
 |
| Driftwood that creates the " mighty cave" :P |
 |
| Cave by The Bay. Haha! :P |
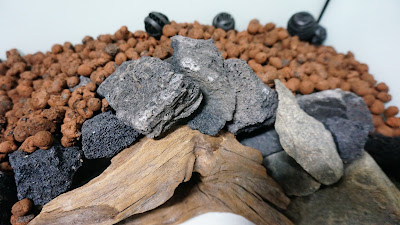
To form the captivity and cave's dome, lava rocks were arranged on top to create the cave structure. Lava rocks are normally light and very porous which can house more beneficial bacteria for planted tanks. Since this tank was going for very low-tech type, the more "in-house" bio media like those lava rocks we have in the tank, the better.
 |
| Forming cave dome by lava rocks |
Next, some left over plastic bio-ball media was put in to fill the bottom layer of the tank.
 |
| Plastic bioballs were scattered at the bottom |
 |
| Bioballs can be good for bacteria housing as well |
A bag of LECA balls was put at the tank bottom to house beneficial bacterias. This tank would be the very low-tech tank, running without filter, hence the more bio media placed in the tank, the better.
 |
| LECA balls were spread at the bottom of the tank. |
 |
| LECA balls were also used to fill in the gaps between lavarocks to make the structure more solid |
Garden soil was put on top of LECA balls layer to keep the balls down at the bottom and not floating up. Garden soil is very rich in nutrient and would be able to nurture the plants properly.
ADA Aquasoil was placed on top of garden soil to create a nice-looking surface and also to contain the mess of garden soil after water is introduced into the tank.
 |
| ADA Aquasoil was placed as a top layer soil |
 |
| The top layer was adjusted according to the desired layout curve |
Sand was introduced in the bay and the hardscape is completed.
 |
| Sand was added in the bay :) |
 |
| The cave now looks quite nice by the bay ya? |
 |
| The Tiny Mighty Cave is here. :) |
 |
| Overall hardscape view |
Planting would be the next step:
Lastly, the tank was covered with glassed to keep the humid environment for emersed growing.
In order to keep the environment always humid, I spray water on the plants once to twice a day in the morning and/or evening. The plants were then always kept in the fresh condition.
Progress of DSM from Day 1 to Day 30 before it was being flooded. ^^
After a month of DSM, all the plants have grown very well in the humid environment. All of them were so lush and beautiful.
It's time to flood the tank! The plants roots have developed very well now! Hence, it would be ready for the submersed adventure! ^_^
 |
| Water was slowly added in the tank |
 |
| A timelapsed video was recorded this big event after a long wait! Haha. |
 |
| Tada! Flooding done! |
 |
| All is well! :) |
 |
| Plants look beautiful |
I hope that you enjoy the journal as much as I do. And here you go, the "Tiny Mighty Cave":
 |
| "The Tiny Mighty Cave" ^_^ |


Thanks for sharing your scaping process. I just curious when you dry start your plants, no need lights?
ReplyDelete